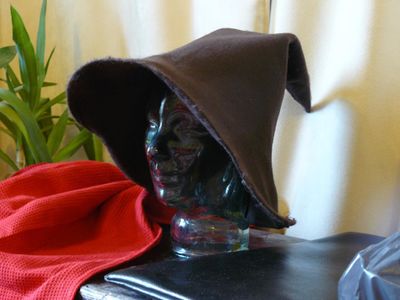
How to - Make a felt hat
Varushkan Felt Hat
This is a traditional European style of hat, simple to make using very basic materials and tools. Traditionally it would be made starting with raw woollen fleece. This would be wound around a conical wooden former, wetted with urine and pounded with wooden bats until the wool compressed together to form a cone of felt. Once dried the cone would be dampened and reshaped into any of a variety of styles. Thankfully, today we have access to ready-made felt…
The instructions below give a quicker and less smelly way of achieving the same. You’re welcome to have a go at using the more traditional method though I suggest using a strong detergent solution instead of urine!
Choosing Fabric:
The hat needs to be made from an unstructured felt rather than a felted woven fabric as it has to be permanently stretched. Ideally you need a heavy-weight felt (at least 4mm) to give you the proper stiffness but most modern craft felt is quite thin. You can get round this by using the felt doubled.
Depending on the size of your head, the width and the thickness of the felt you'll need about 3/4 meter, or a whole meter if you're doubling up the fabric.
Marking up:
The hat starts out as a cone shape so you need to cut a quarter circle. Measure round your head just above the eyebrows and use this measurement (A-B) to mark out an arc from one corner. CLARIFICATION: This measurement is just to give you the right proportions for the hat, neither of the straight edges or the curved line actually fit around the brow line. If you are doubling up, mark out a second piece about 1cm smaller (grey).
Sewing:
Pin the straight edges of the cone together, overlapping the straight edges rather than making an edge to edge seam. Sew by hand using a loose running stitch. If you're doubling up, make sure the smaller cone is inside. TIP: It's easier to sew from the pointed to the open end rather than the other way round.
Turn under the edge of the open end about 1cm (if you've doubled up, just turn the overlap. Sew along the turn to hold it in place, again using a loose running stitch, but leave a long tail of thread and don't fasten off the end. You need to allow the thread free to pull through the felt when you stretch the brim.
Stretching to shape:
Thoroughly wet the felt then press out the excess water with a towel (don't wring!).
Now you start to stretch the brim, working from the very edge round and round and working inwards. Pull from side to side, stretching along the edge of the brim, NOT outwards from the crown. The brim will get narrower from edge to crown – this is normal.
Some felts don't need much force to stretch, others will take a lot of pulling so start gently. This is where you'll need to use your judgement as to how far up the hat you need to go and how much you need to stretch to get the shape you want. You'll end up with a brim that curves gently into the crown rather than sharply.
Finishing:
Leave the hat to almost dry. While it's still very slightly damp press the brim with a hot iron to fix the shape. Leave to dry completely.
Repeat the stretching and finishing steps until you're happy with the shape.
Decorate & trim to taste (or lack of…)
