How to - Make a hard leather mask
Mask Making
This guide will show you how I made a hardened leather mask.
Materials
-2mm thick veg tan leather, other weights can be used but I find this is a good for masks -Buckle (+ rivets) for attaching the mask, you could also use string or leather lace -Leather dyes or Acrylic Paints -Supersheen, Dubbin Wax or a Leather finisher ¥ -Neat foot oil, leather moisturiser (yes it does exist) or even moisturiser
Tools
-Sharp knife -Leather Punch -Hammer (if you are using a rivets) -Hairdryer (i'm not kidding) or patience
A quick note on leather:
The "Grain Side" is the hair side of the animal and is most commonly used for carving and stamping. If you look at the cross-section of the leather you will notice a thin smooth line - this is called the grain layer, it is about one fifth of the thickness of the hide. The "Flesh Side" is the side of the leather that was next to the meat/flesh of the animal. It is generally very rough. Between the two layers are the leather fibres.
�
Making the mask shape
Right - lets dive right in - first I cut the leather to the area of the face I wanted to cover. It is a good idea to measure the face first and add the extra leather for the nose. Add a little extra for contingency.
The first step is to soak the leather. When you moisten leather the fibres swell and soften. This makes the perfect mix for moulding leather. I put the leather into bowl of water flesh side up, waited for the ir bubbles to form on the flesh side - when the last air bubbles leave the leather it will be ready.
Tip: It can take some time for the bubbles to leave, so tap the leather gently (whilst in the water) and if no new bubbles form after a few minutes then it's ready.
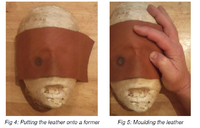
I took the leather and put it on the face of the person the mask is for. You can also use a plaster face or even a polystyrene one but the real thing is better.
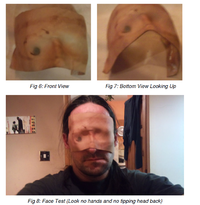
I moulded the mask to the face by stretching the leather This can be done by kneading the leather with your thumbs. As it dries it will retain its shape, and the thicker the leather the more time it takes. This can take a long time and a lot of patience, but remember that but every time you apply direct heat to leather you run the risk of it warping or cracking. To speed up the process, as I had to hold the leather in place until it was fairly dry, you can put it in an area with warm circulating air, like an airing cupboard. If you're short of time, very gentle heat with a hairdryer can work, but it can risk damaging your leather.
Once the leather is fairly dry Ifinished it moulding off with my fingers. I aided this process by wetting small areas like the eye sockets and stretching the leather further.
Once I was happy with the shape, I put it in the oven at its minimum settings, and waited until the leather was starting to get fairly rigid.
Note from the art team
While Gary had good results from this, in our experience ovens are so variable that you can risk damaghing the leather irreversibly by baking it. We would suggest air drying in a warm, well ventilated area.
If you can put the mask on a former like a plaster face or even just draped over a tin this will help to the mask to keep it shape as it hardens.
After Baking
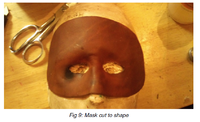
I trimmed the mask to the required shape - this took a while to get right and I spent extra time making sure the eyes holes were in the right place.
Finishing the Mask
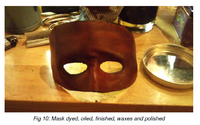
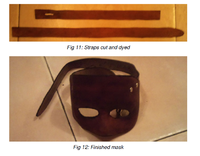
I used a good oil based leather dye to get the colour I wanted. The dyeing process made the mask flexible again so it was back on the form to dry.
At this stage I used Neat's Foot Oil to drying and cracking. It is used to recondition/oil saddles and outdoor gear. It will significantly darken most leathers. You can however use any reconditioning leather product at this point.
Next a coat of Supersheen or Leather Finish to protect my mask from the harsh outdoors. The last coat is a good wax with Dubbin. Dubbin is a wax product used to soften, condition and waterproof leather and other materials. I let it dry again, gave a quick polish with a rag and the mask itself was done. Now just to finish it off.
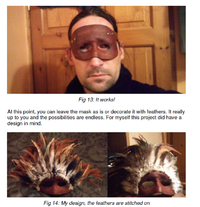
At this point I added a strap and a buckle.
I hope you have many enjoyable hours creating items of wonder.
Gary Longford
�


