How to - Adapt a pattern for a high status dress
Overview
Attempting something that looks as complex as a medieval style dress can be a pretty daunting prospect, even for someone with a bit of experience in dressmaking. Fortunately, there are lots of patterns available, ranging from some very "costumey" ones made by pattern companies such as Simplicity, Butterick and McCall's, through to incredibly well researched and complex ones by the likes of Reconstructing History.
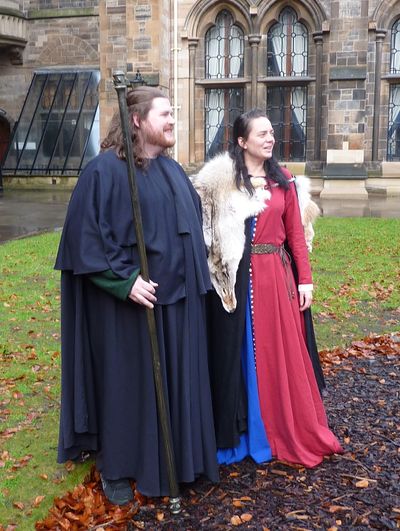
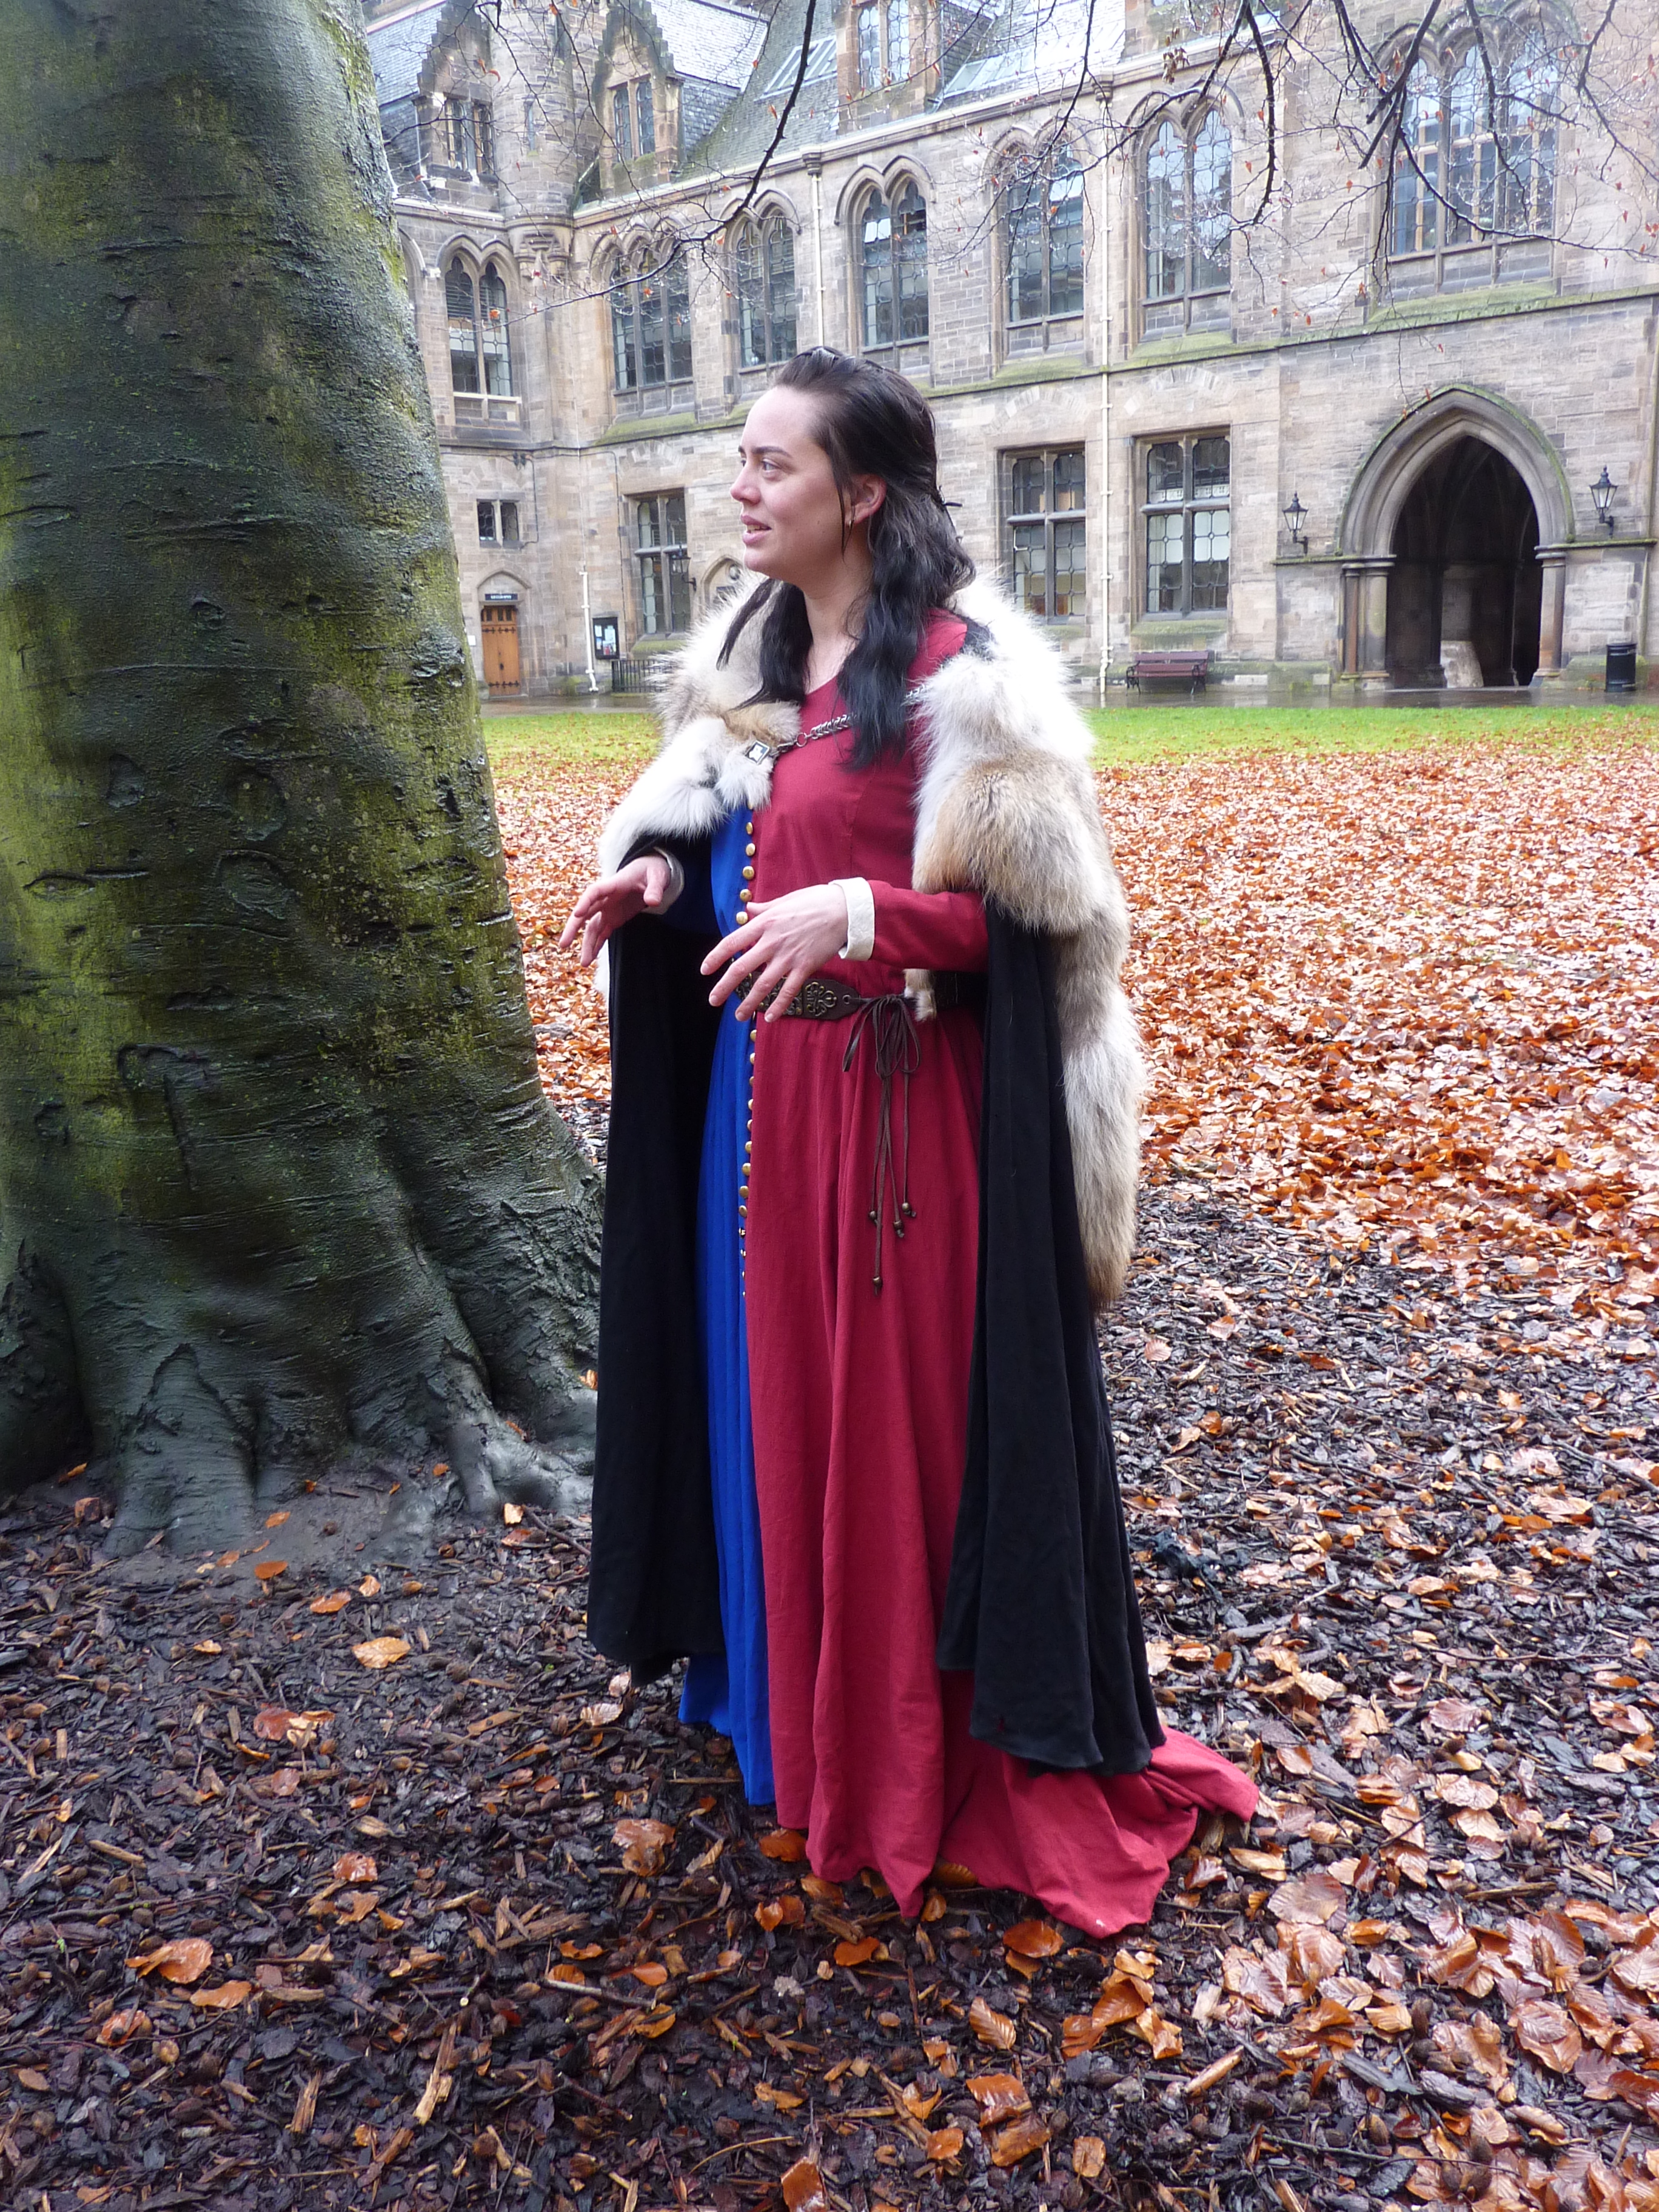
The beauty of using a pattern is that you don't have to do it exactly like the instructions say. The pattern gives you the basic shapes, and from there you can play with colours, lengths, trims and buttons until you get something uniquely your own. Using this pattern, I made a dress in heraldic colours with buttons down the front, as a good approximation of a medieval cotehardie, suitable for a Dawnish lady, a wealthy marcher Steward, or even a Highguard noble, particularly if you made it in black or black-and-white to match her Chapter's colours.
Butterick 4287 is a good pattern for a medieval dress that you can have a lot of fun with. Here's how I did it, with a few pointers that might save you some time, and spark off your own creativity.
Working with commercial patterns
If you've got experience using patterns, feel free to skip this bit! Here are a few things to be aware of if you're just starting out.
Pattern sizes don't match ready-to-wear If you wear a size 14, for example, in day to day clothes, don't assume that you'll cut and make a size 14 in your pattern. When you go to get your pattern, make sure you know your waist, bust and hip measurements, and buy the pattern that matches them (you usually get a range of three sizes for each pattern). When you're cutting out, use the size that matches your largest measurement.
Patterns tend to run a little big Generally they make up a little large. Part of this is the design, and part of it is that the seam allowances are usually larger than you think. Make sure you read the instructions and sew the correct distance from the edge of the pieces.
You may not be 5 ft 6, but the pattern thinks you are If you're much taller than this, I suggest adding a bit to the length of the skirts. If you're shorter, you can trim it off at the end.
It's not as hard as it looks Take your time, read the instructions through and take it one step at a time.
Butterick 4827
This is a princess seamed, full length dress with a small train, long straight sleeves and a scoop neck. The pattern shows it with a shaped neck facing, a faced back opening and a laced closure with eyelets.
Fabric
You will need-
- 3m of each of two colours of fabric. I used linen-look cotton - cheap and cheerful at £4.50 per metre.Pre-wash it on a hot wash to get all the shrinkage out of the way.
- 54 small round metal buttons or thereabouts (mine cost 10p each)
- 1m lining fabric for the sleeves - cotton curtain lining at £1.75 per metre from ikea looks good
- Thread
- 1m bias binding
Walkthrough
Cut out your pattern pieces - 1, 2, 3 and 4 are the front, side front, side back and back of the dress, in the size that matches your measurements. Cut the sleeve piece out too.
Now, lay out your unfolded fabric, with one colour on top of the other, and pin the pattern pieces on. Ignore the cutting layout given in the pattern - it's rubbish and wasteful. Move your pieces around so you can fit them all in, and so that you waste as little fabric as possible. You can always widen or narrow the skirt parts of the pattern pieces to fit the cloth you have. Then cut your pieces of fabric out- you should end up with one set of front, side front, side back, back and a sleeve in each colour. Ignore all the other pattern pieces.
Pin your pieces together- the pattern instructions will help here. Where the front meets the side front, you'll have to be quite careful - match the notches and slightly stretch one piece of fabric more than the other so that they line up perfectly along the seam line (1,5cm from the edge). Pin all the pieces together, then slip the gown over your head and see if you can get it on - pins should be on the outside.
The pattern is really big!
I found it was enormous at this stage- way baggy at the neck, and I could slip it on without any need for a closure (which is handy, and I decided to keep it that way). I moved the pins at the centre front and centre back so that at the top it was tighter- from the bust down I kept it the same, but pinned in a good two inches front and back at the neck, smoothly tapering that line until it met the seam line lower down. You might find getting a friend to pin the back in helps
Check you're happy with the fit, and slither out, losing as few pins as you can at this stage. Sew down your pinned lines, removing the pins as you go (otherwise you might break a sewing machine needle). Once sewn, remove all the pins. Try the frock on again. Re-pin and stitch if you need to alter the fit in some areas.
Now iron all your seams. I mean it! Finish your neck line with bias tape - sew it right side to right side round the neck, then turn it to the inside so it's invisible, and stitch it in place by hand.
Take your sleeve pieces and make sure you've got them the right way round.Then match each sleeve to its lining and sew the cuff edges together. You can then sew the sleeve and its lining continuously into a long tube, then turn the lining inside the outer fabric and tack it together at the sleeve head, having made a complete lined sleeve. You can stitch around the top to hold the two layers together - stitch close to the edge, and this will be hidden in the armhole of your dress.
Next, fit the sleeve to the arm hole in the dress, following the instructions in the pattern (and easing it a little bit as you go) and stitching your sleeves in place. Start by matching the underarm seams of the sleeve and the dress, and pin the shoulder seam so it matches the middle of the top of the sleeve, then pin it evenly all the way round. I put the sleeves in backwards this time. (See, there isn't a mistake you can make that I haven't done already!)
Hem the bottom edge of your frock. No one will see it, so use the sewing machine and spare your sanity.
Then, down the centre front seam, mark 1 inch intervals in dots of marker pen, and sew your buttons on for decoration. I advise getting a good movie while you do this. It's fiddly and time consuming, but details like this can really make your costume stand out.
Done! Total cost: £38, plus whatever you paid for the pattern - which, if you've cut and pinned it carefully you can use again. Wear with a belt.
What else could I do?
I found the sleeves on the original pattern a bit wide, so I tapered them down to a narrow cuff. You could do that if you want, or cut them off at the elbow, or keep them wide so you can roll them up.
You could change the length of the dress to make it ankle, knee or thigh height - you could put the buttons on in groups of 2 or 3, or space them out more.
You could alternate coloured panels in the dress, make it in one colour, put lacing down the front, add trim round the collar...
Make it your own! Now go have fun.

